|
Liquid Tooling Materials Selection Guide
(Part 1 of 2: Choosing a Liquid Tooling System)
Go directly to Part 2 of 2: Choosing a Liquid Tooling Material
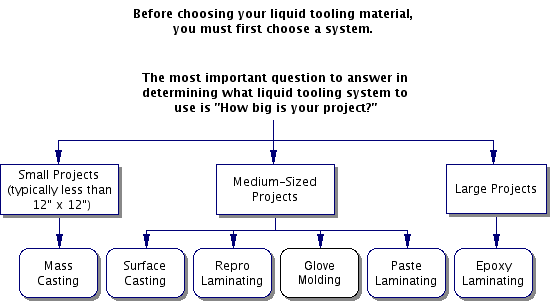
Mass Casting Thick Parts (Small Projects)
Mass Casting is the easiest and most popular method for creating a pattern, part, tool, or mold. It is the ideal method for smaller parts and offers the widest range of materials to suit any application. (see video for more in-depth instruction)
|
|
|
|
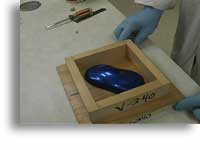
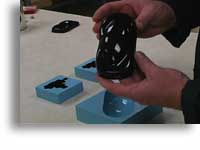
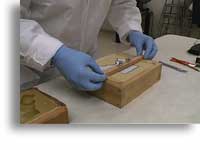
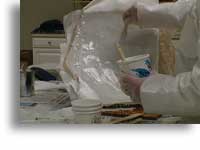
| 1. For negative mold casting, a mold box is created around your initial model. |
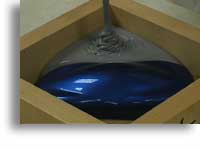
2. Material (usually urethane or silicone rubber) is poured around the model and allowed to cure. |
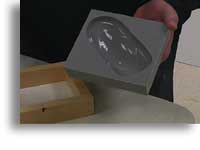
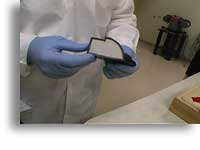
3. The mold is removed from the mold box and it ready for positive casting. |
|
|
|
|
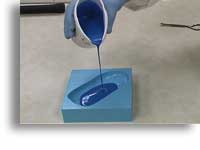
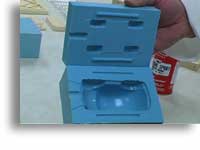
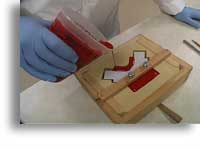
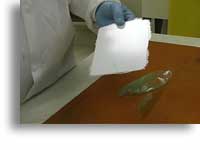
| 4. For positive part casting, a filled urethane or epoxy is poured into the mold and allowed to cure. |
5. Once hardened, the part can be demolded; it will require additional time to reach a fully cured state. |
For parts without a flat side, a two-part mold is created featuring a parting line. (see video) |
Mass Casting Thin-Walled Parts (Small Projects)
Mass casting is a term we also use to describe the casting of thin-walled parts. However, since filled urethanes like Repro tend to be more brittle in thin sections, we recommend unfilled polyurethane elastomers such as those in our Freeman Polyurethane Elastomer line, which vary in durometer from very flexible (ie. Freeman 1035) to very rigid (ie. Freeman 1080). Also, when molding and casting thin parts, proper venting is critical to ensure that the material flows throughout the mold cavity before curing.
Surface Casting (Medium Projects)
Surface Casting is a process of pouring a higher performance material around a more economical core material (such as a filled urethane) to form a highly accurate, yet economical part. (see video for more in-depth instruction)
|
|
|
|
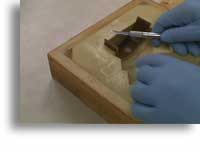
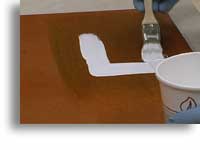
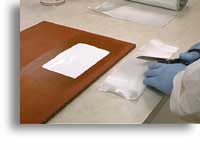
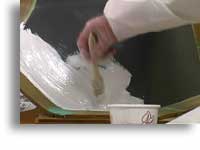
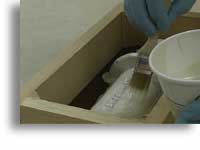
| 1. Sheet wax is applied to create a uniform thickness around the mold area. |
2. A core is poured into the sheet wax layer using lower-cost filled urethane such as Repro Fast. The core is then allowed to cure. |
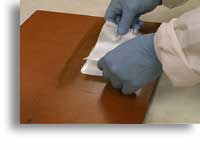
3. The core is demolded and the sheet wax is removed. Then the core is suspended over the mold, revealing the uniform gap created by the sheet wax. |
|
|
|
|
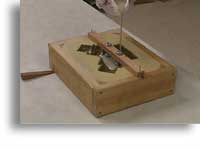
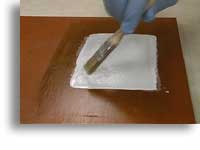
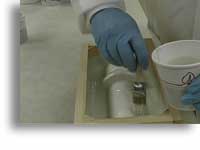
| 4. An unfilled urethane (such as Freeman 1060) is poured between core and mold to create a durable part surface |
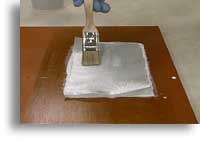
5. Once hardened, the part is can be demolded; it may require additional time to reach a fully cured state. |
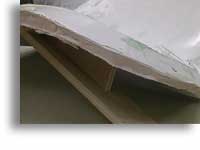
Here is a cross-section of a surface casting, showing a core made of Repro Fast surrounded by Freeman 1060 |
Epoxy Laminating Systems (Larger Projects)
The most time-intensive process, epoxy laminating is a popular method for our customers who need a large, strong, and lightweight tool. (see video for more in-depth instruction)
|
|
|
|
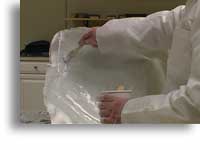
| 1. One surface coat is applied and allowed to reach the almost tack-free state, then a second coat is applied. |
2. Fiberglass cloth is cut to appropriate size. |
3. Once the second surface coat reaches the almost tack-free state, apply a single coat of laminating resin and lay up the first layer of cloth. |
|
|
|
|
| 4. Apply light pressure with a cut brush in order to bring the laminating resin through the cloth. |
5. You can apply up to 12 layers of 10 ounce cloth in one session. If more layers are required to reach the desired thickness and strength, allow the resin to cure before laying up additional layers. |
6. Once the resin has cured overnight, you can demold your tool and clean off the release agent (PVA). |
Glove Molding Systems (Medium Projects)
This process creates thin, flexible layer of material which is then backed up by a rigid material, thus providing the stability of a rigid mold with the demolding ease of a flexible mold. See Video for more in-depth instruction)
Paste Laminating Systems (Medium Projects)
This process is designed to lessen the considerable time required to follow the epoxy laminating systems below. By replacing multiple layers of fiberglass cloth with a paste laminate material such as our Freeman 1020, you can create a medium-sized tool in as little as half the time without sacrificing strength or stability. (Coming Soon: Video for more in-depth instruction)
|
|
|
|
| 1. Two surface coat layers are applied as in the epoxy laminating systems below. |
2. Three layers of laminating resin and fiberglass cloth are applied, similar to the epoxy laminating systems below.
|
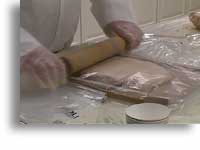
3. The paste laminate is mixed by hand and then rolled out to a uniform 1/2" thick patty. |
|
|
|
|
| 4. The paste laminate is cut into strips and applied to the back of the fiberglass cloth. |
5. A final three layers of fiberglass cloth is laid up with laminating resin, as in step 2. |
6. Here you see a cross-section of the finished tool; note the paste laminate in between the triple layers of fiberglass cloth. |
Repro Laminating System (Medium Projects)
This system is a popular choice for our customers who are making a medium-sized tool, (approx. 1-25 square feet in surface area), and don’t need the strength of an epoxy. Advantages include lower cost, 1:1 mix ratio, shorter tack times, low exotherm, and ease of application in areas of fine detail. (see video for more in-depth instruction)
|
|
|
|
| 1. One surface coat is applied and allowed to reach the almost tack-free state, then a second coat is applied. |
2. Once the second surface coat reaches the almost tack-free state, a single coat of laminating resin is applied to act as an adhesion layer. |
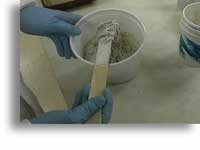
3. Laminating resin is mixed with fiberglass strand until a dough-like consistency is reached. |
|
|
|
|
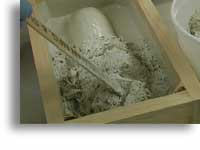
| 4. The mixture is applied to the tool to create a 3/16" - 1/4" backing. |
5. As the mixture dries, it can easily be formed by hand. |
6. After 3-4 hours, the tool can be demolded; it may require additional time to reach a fully cured state. |
Go to Part 2: Choosing a Liquid Tooling Material
|